Main window
The JetScalp main window is the terminal’s primary working area. In it, you open order books, charts, Watchlist, Screener, Alerts, trading tables and additional workspace windows.
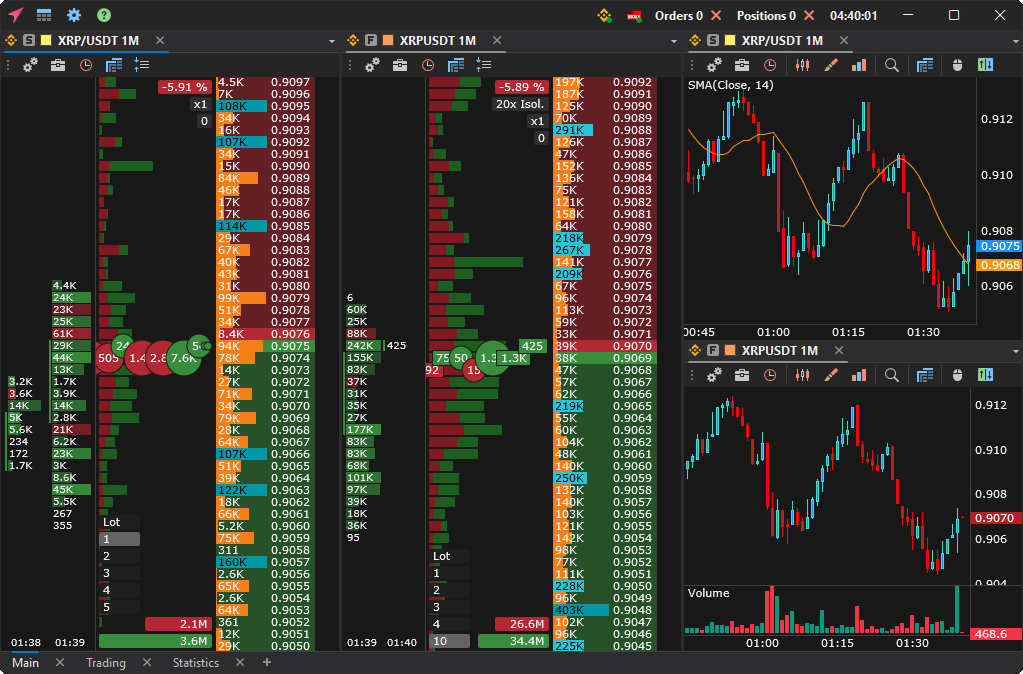
Terminal toolbar
The top of the main window contains the main control buttons: opening working windows, settings, help, connection indicators and trading indicators.

| Element | Description |
|---|---|
| Windows | Opens the menu: Order book, Chart, Tape, Combo window, Watchlist, Screener, Alerts, Notifications, Trading, Workspace, Layout builder. |
| Settings | Opens application settings, connections, configuration, diagnostics and service commands. |
| Help | Opens a menu: Documentation — this documentation in the browser, About — the terminal version and the website address. |
| Connection indicators | Show the status of connections and let you go to their settings. |
| Orders / Positions | Show the number of active orders and open positions. They are buttons: a click cancels all orders or (after confirmation) closes all positions — see The Orders and Positions buttons. |
| Time | Shows the current time in the terminal. |
Window open menu
The window open menu creates the terminal’s main working windows.
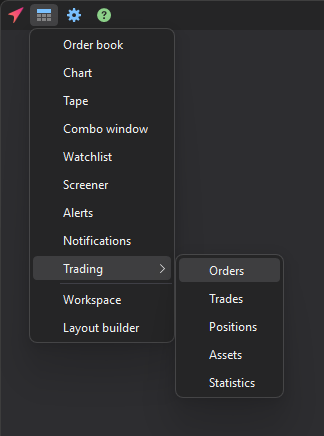
| Element | Description |
|---|---|
| Order book | Opens the order book window with the tape, clusters and trading elements. |
| Chart | Opens a symbol chart. |
| Tape | Opens the Tape window — the trades of a symbol as a table with a volume filter. |
| Combo window | Opens the Combo window — order books of one symbol on several exchanges at once. |
| Watchlist | Opens a custom list of symbols. |
| Screener | Opens an automatic search for active symbols. |
| Alerts | Opens the list of created alert levels (Alerts). |
| Notifications | Opens the history of triggered alerts and notifications (Notifications window). |
| Trading | Opens trading tables: Orders, Trades, Positions, Assets, Statistics. |
| Workspace | Opens a separate workspace in a separate window. |
| Layout builder | Opens the Workspace builder window — a quick layout of order books and charts (Workspace builder). |
The Windows menu of a separate workspace window has no Workspace item.
The Orders and Positions buttons
On the right of the toolbar are the Orders and Positions counters: how many active orders and open positions you have across all connections. They are buttons:
- clicking Orders cancels all active orders on all connections; stop losses and take profits stay;
- clicking Positions closes all open positions on all connections: first the terminal asks “Close all positions?” in the “Close all positions” window.
Important: The Orders button acts immediately, without confirmation. Do not click the counter if you only want to see the number of orders.
Settings menu
The settings button opens a menu with the terminal’s main service sections: application settings, connections, configuration, diagnostics, data refresh, hiding panels and tabs, and signing out.
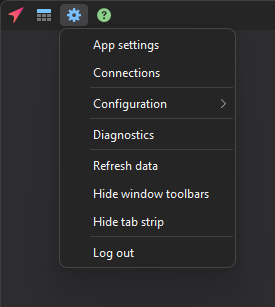
| Item | Description |
|---|---|
| App settings | General settings for the interface, symbols, trading, order book, chart, sounds, order sizes, combo window, authorization, hotkeys and themes. |
| Connections | Management of trading connections and proxies. |
| Configuration | Creating, loading and saving the complete set of terminal settings. |
| Diagnostics | Viewing logs and saving the log for support. |
| Refresh data | Forces a refresh of clusters and charts. |
| Hide window toolbars | Frees up space for work areas by hiding window toolbars. |
| Hide tab strip | Hides the tab strip. |
| Log out | Signs you out of your JetScalp account. The terminal asks for confirmation and, if you have open positions or active orders, warns you about them. After you confirm, the terminal restarts and opens the sign-in window; you can sign in again only with your password (Quick start, step 2). |
Free window layout
You can arrange windows within the workspace any way you like — there is no fixed layout. For example:
- several order books in one row;
- charts under the corresponding order books;
- Screener on the right, trading tables in the center;
- orders and positions in a separate tab;
- several work areas in one workspace;
- separate workspace windows on other monitors.
Windows stand in groups: each group has a strip with the tabs of its windows at the top.
| Action | How |
|---|---|
| Dock a window | Drag the window tab out of the strip. A guide with five buttons appears over the group under the cursor: the center one adds the window as a tab to this group, the side ones place it to the left, right, top or bottom of the group. Release the mouse over a button — the window takes the highlighted place. |
| Float a window | Release the tab not over a guide button: the window stays as a separate window where you dropped it. A separate window is dragged by its strip. To return it to the workspace, drop it on a guide button or double-click its strip — the window becomes a new group on the right. |
| Move a window to another tab or another app window | Drag the window onto the work area of another workspace window. To move it to another tab, hold the cursor over that tab: it opens, and you can drop the window on its work area. |
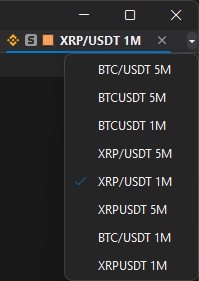
| Pick a group window from a list | Click ▾ on the right of the group strip: a list of its windows opens, with the selected one checked. |
| Copy a window | Right-click the window tab and select Copy window. The copy with the same settings and symbol becomes a new group to the right of the window; a copy of a separate window opens as a separate window next to it. |
| Rename a watchlist or screener window | Right-click the window tab, select Rename tab and enter a new name. |
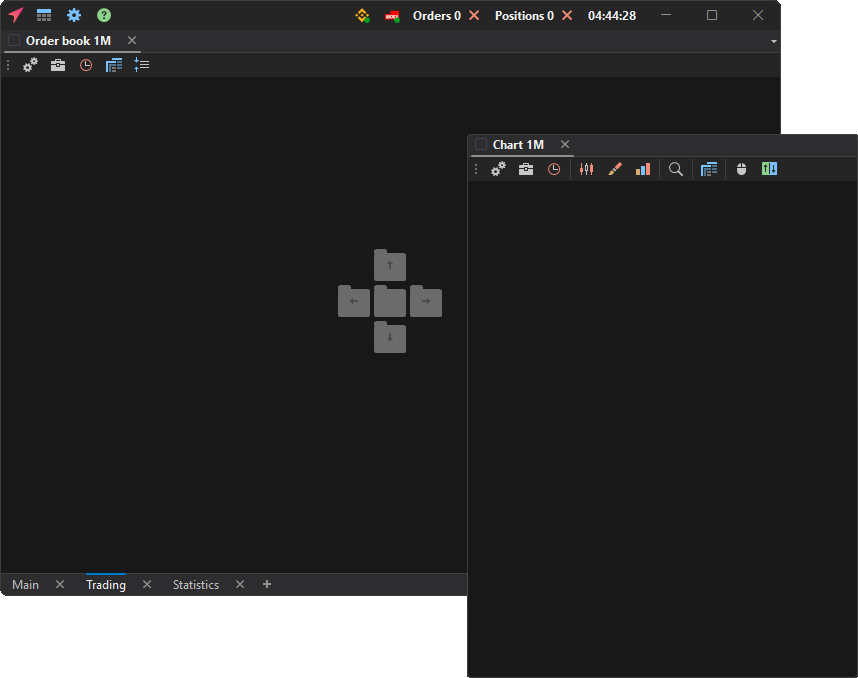
The size of neighboring groups is changed by dragging the splitter between them. With Resize windows with a preview line on (Interface, on by default), only a line is shown while you drag, and the windows resize when you release the mouse. With the parameter off, the windows resize right away, following the mouse.
Hiding panels and tabs
The Hide window toolbars and Hide tab strip commands free up screen space. They come in handy when the workspace is already set up and you do not need constant access to the control panels.
Tabs
Tabs are located at the bottom of the work area. Use them to separate different sets of windows. For example, you can create tabs for Binance, Bybit, MOEX, Screener, orders or test trading.

Tabs are convenient when you do not need to keep all windows on one screen at the same time.
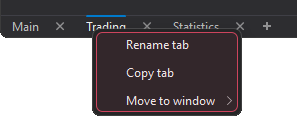
To rename, copy or move a tab, use its menu: right-click the tab.
| Action | How |
|---|---|
| Create a tab | Click + to the right of the tabs. The new tab opens empty and becomes active right away. |
| Rename a tab | Right-click the tab, select Rename tab, enter a new name and confirm. |
| Copy a tab | Right-click the tab and select Copy tab. A “Name (copy)” tab with copies of all windows appears next to it. The windows of the copy are independent of the original; for the link colors they get, see Window linking. |
| Move a tab to another window | Right-click the tab and select Move to window → New window or another app window from the list. The tab moves together with its windows; order books and charts keep their data. |
| Drag a tab out | Drag the tab out of the tab strip. If you release it over the tab strip of another app window, it moves there; if over an empty place, it opens as a new workspace window where you released it. |
| Close a tab | Click the cross to the right of the tab name and confirm. All windows of this tab are closed. If you close the last tab, the terminal immediately creates a new empty one. |
| Reorder tabs | Drag a tab to a new position in the strip. |
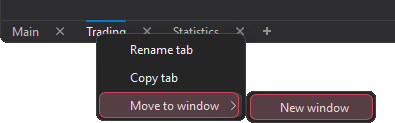
If you move the last tab out of a workspace window, that window closes; in the main window a new empty tab takes its place.
The same tab actions are available in separate workspace windows.
You can move the tabs into the window title bar to free up space at the bottom: turn on Tabs in the window title (Interface, off by default).

Exchange icon on a window tab
On the tab of a window with a symbol — for example, an order book or a chart — an exchange icon is shown to the left of the title. Click it to open the same symbol on another exchange: a list of the same symbols (with the same base and quote assets) on your other connected exchanges appears. Select one — the window switches to it, and linked windows switch along with it.
If the window is pinned to spot or futures, the list contains only symbols of that market. For MOEX the list is different: for a futures contract it shows futures with other expiration dates on the same underlying asset, for a stock it shows futures on that stock.
The last item of the list is Open on all exchanges: it opens the Combo window with the symbol of this window.
The icon is shown if the Show exchange icon on tabs option is enabled in the settings (Interface). Switching between spot and futures of the same exchange and pinning the market type are described in Window linking.
Workspace builder
The Workspace builder is the quickest way to get a working layout: in one step it places order books, charts, Watchlist and Screener on a tab. To open it, select Windows → Layout builder.
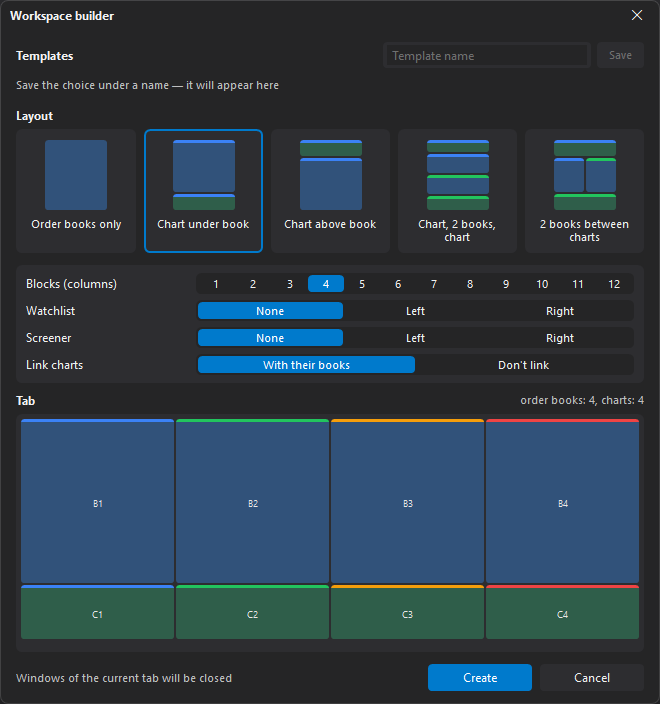
The layout consists of identical blocks — columns from left to right. What one block contains is set by the layout scheme.
| Parameter | Description |
|---|---|
| Layout | What a block contains: Order books only; Chart under book; Chart above book; Chart, 2 books, chart — four windows in a column: the chart of the first order book, two order books, the chart of the second; 2 books between charts — two order books side by side, the chart of the first above them and the chart of the second below them. Chart under book by default. |
| Blocks (columns) | How many blocks to place in a row: from 1 to 12, 4 by default. |
| Watchlist | Where to place the Watchlist window: None, Left or Right. |
| Screener | Where to place the Screener window: None, Left or Right. If Watchlist and Screener are on the same side, they stand one under the other. |
| Link charts | With their books — each “order book — chart” pair gets its own link color: a symbol selected in the order book also opens in its chart; Don’t link — no linking. If the layout has no charts, the row says “The layout has no charts” instead of a choice. |
Under the parameters is a preview of the whole layout with the number of order books and charts in it. The preview changes with every choice.
Click Create — the layout is built on the current tab. The builder remembers the last choice and starts from it next time. The Tab block with the preview has a reminder: “Windows of the current tab will be closed”. Enter also creates the layout (in the template name field it saves the template), Esc closes the builder.
Important: The builder closes all windows of the current tab without confirmation and puts the new layout in their place. To keep your current layout, first create a new tab with the + button and open the builder on it.
A good choice can be saved as a template. In the Templates block, enter a template name (up to 32 characters) and click Save. If a template with this name already exists, the button reads Replace and overwrites it. You can have at most 20 templates. Clicking a template sets its parameters, the cross on a template deletes it; the template that matches the current choice is highlighted.
The builder is also available in separate workspace windows — there it builds the layout on the current tab of that window.
Workspace in a separate window
You can open a workspace in a separate window: Windows → Workspace. The same working elements are available inside such a window: order books, charts, Watchlist, Screener, Alerts and trading tables.
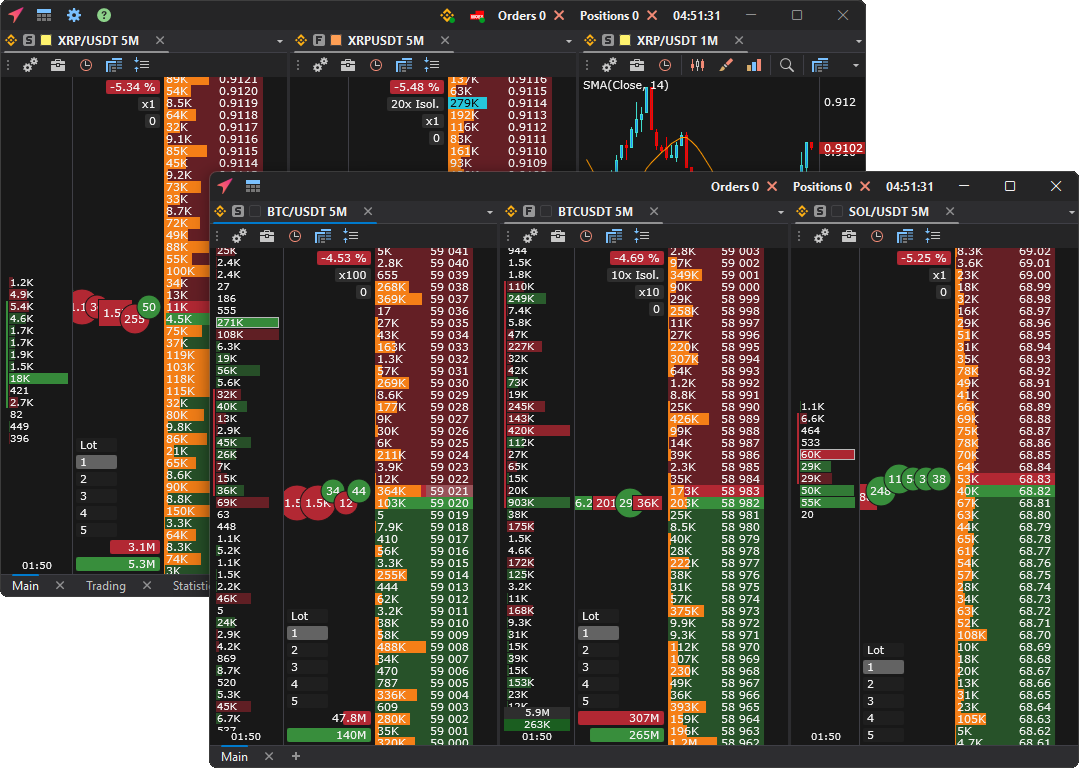
If you use several monitors, open separate workspace windows. For example, keep the main monitor for order books, the second one for charts and Screener, and the third one for orders, positions and statistics.
| Scenario | How to arrange windows |
|---|---|
| One monitor | The main window contains all work areas. |
| Two monitors | Main window — order books and charts, separate workspace — Screener and tables. |
| Three monitors | Main window — trading, first workspace — analysis, second workspace — orders, positions, Alerts. |
Closing windows and the application
When you close a separate workspace window, the terminal asks: “What do you want to close?”
| Button | What happens |
|---|---|
| Application | The whole terminal closes — the same as closing the main window. |
| Workspace | Only this workspace window closes. Its tabs and windows are deleted and are not restored at the next launch. |
To close nothing, press Esc or close the question with the cross.
When you close the main window, the terminal saves the settings and window layout. If you have open positions or active orders, the terminal reminds you about them and asks whether you really want to close the application.
Important: Closing the terminal does not close positions or cancel orders — they remain on the exchange.